ClickUp is a comprehensive cloud-based project management platform that combines task management, team collaboration, and automation features in one place. It’s designed to serve teams of all sizes – from solo freelancers to large enterprises – aiming to enhance productivity and streamline workflows. With software’s all-in-one approach to project management, you can organize tasks, track progress, and automate routine work without juggling multiple tools.
In this guide, we’ll walk through how to use ClickUp for project management effectively, covering everything from initial setup to advanced tips.
Before diving into its advanced project management features, you’ll need to get the basics in place. Getting started involves creating your account and setting up your Workspace (the top-level container for your organization’s projects).
Follow these initial steps to begin using ClickUp for project management.
Creating Your ClickUp Account
To start using ClickUp, the first step is to sign up for an account. The platform offers a robust free plan (with the option to upgrade for additional features as your needs grow), so you can get started at no cost. Here’s how to create your ClickUp project management account:
- Sign Up on ClickUp: Visit the ClickUp homepage and click ‘Get Started’ or ‘Sign Up.’ You can use your email or sign up with a Google account for ease
- Choose a Plan: Pick a plan that fits your needs. The Free plan offers unlimited tasks and members—good enough to start. You can upgrade anytime for more features
- Set Up Your Profile: After verifying your email, log in and add basic details like your name, avatar, and organization to personalize your workspace
- Complete Onboarding (Optional): You may see a quick tour or questions about your goals. This helps tailor your setup, but it’s optional and can be skipped
Once your account is created, you’re ready to configure your Workspace and start managing projects in ClickUp.
Setting Up Your Workspace
In ClickUp’s hierarchy, a Workspace is the highest level that represents your entire organization or company (or even a personal domain if you’re an individual user). Within your Workspace, you’ll create Spaces, Folders, and Lists to organize projects and tasks (we’ll explain those in the next section).
Here’s how to set up a Workspace in ClickUp:
- Create or Rename Your Workspace: The platform may create a default Workspace during sign-up. You can rename it in Workspace settings or create a new one from your account menu
- Invite Team Members: Click ‘Invite’ in the lower-left Sidebar, enter the email addresses, select Member or Admin from the dropdown, and click ‘Invite’ to send. They’ll receive an invitation to join
- Configure Workspace Settings: Adjust settings like time zone, week start, and enable ClickApps (features like time tracking or sprints). You can also assign user roles or guest access
- Create Spaces for Teams/Projects: Set up Spaces for departments or project categories (e. g. , ‘Marketing’ or ‘Client Projects’). Having at least one Space helps you start organizing work
One key to using ClickUp effectively is understanding its hierarchical structure for organizing work. ClickUp’s hierarchy ensures everything is neatly arranged from broad categories down to individual tasks. The main layers of this structure include Workspaces, Spaces, Folders, Lists, tasks, subtasks, and checklists.
Let’s break down what each of these levels means:
Workspaces, Spaces, Folders, And Lists
In summary, the hierarchy goes: Workspace > Space > Folder > List > Task (and tasks can further have subtasks). Here is the breakdown of each level:
- Workspace : The top-most level in ClickUp, representing your entire organization or account. It contains all other work levels. For example, the Acme Corp Workspace would hold all projects and teams for Acme Corp
- Spaces: Created within a Workspace to separate teams, departments, or functions—like Marketing, Product Development, or Operations. Spaces allow permission settings and customization per team. (They act like virtual departments inside your Workspace)
- Folders: An optional layer inside a Space used to group related projects or lists. For example, in the Marketing Space, you might have Folders for Campaigns, Events, and Content Calendar. Folders contain one or more Lists. (You can also skip Folders and create Lists directly in a Space)
- Lists: The lowest grouping level in a Space (or Folder). A List contains tasks—like a project’s task list or backlog. For example, under a ‘Campaigns’ Folder, you might have a List for Q4 Launch Campaign Tasks. Lists can have custom statuses and organize your tasks
Tasks, Subtasks, And Checklists
At the heart of any project in ClickUp are tasks—the individual to-do items or work units that need to be completed.
- Tasks: A task is a single work item or action that needs to be done. You can assign it, set due dates, add descriptions, attach files, and discuss via comments. Tasks can also have custom fields like priority or estimated hours
- Subtasks: For complex tasks, you can create subtasks under a parent task. These smaller steps—like ‘Design homepage’ or ‘Write copy’—can be assigned, tracked, and scheduled separately, helping break work into manageable pieces
- Checklists: Checklists let you break down tasks into simple, checkable steps—ideal for quick to-dos or quality checks within a task. Unlike subtasks, they aren’t separate work items but handy for tracking minor actions
Now that your ClickUp Workspace is set up and you understand the hierarchy, you can start creating projects and adding tasks. In ClickUp, a ‘project’ isn’t a special item—you create a Space, Folder, or List to serve as the project container. Many users treat a Folder as a project with one or more Lists, while others use a single List if no grouping is needed. Either way, starting a project and adding tasks is simple.
Starting A New Project
The process involves naming the project, choosing a layout, and configuring permissions. ClickUp also offers project templates to help define scope, objectives, and deliverables—saving time with pre-set workflows and structures. To start a new project:
- Define Project Goals: Outline objectives, scope, timeline, budget, and key details. You can use a ClickUp Doc to capture this
- Create a New Project: In your Space, click the ‘Projects’ tab or ‘Create new’ button
- Name Your Project: Choose a clear name that reflects its purpose
- Select a Project Template: Pick from ClickUp’s templates or your custom ones to apply a pre-defined structure
- Configure Layout (Views): Choose primary views like List, Board, or Gantt and set them as default
- Set Permissions: Decide access levels for team members—Full Edit, Edit, Comment, or View Only—and assign roles accordingly
Adding And Assigning Tasks
Once a project is initiated, the next critical step is to populate it with tasks and ensure they are properly assigned and detailed. To add and assign tasks in ClickUp:
- Access Task Creation: In any Space, Folder, or List, click the ‘+ Task’ button (usually bottom right) or use the ‘T’ hotkey
- Enter Task Details: Add a task name, description, relevant files, subtasks, or checklists
- Assign Tasks: Open the task, click ‘Assign,’ and select team members. If they aren’t in the Workspace, invite them via email. Assigned tasks appear on their home pages
- Set Due Dates: Click ‘Add dates’ to set start and due dates. You can enter specific times or use natural language like ‘Friday at 3pm.’ Tasks without a set time default to 4 am local time
- Add Attachments: Drag and drop files or use the upload icon. You can also add files from cloud storage. Max file size is 1GB, with up to 1,000 attachments per task. Use cloud storage for larger files
- Add Other Details: Use labels, priorities, and custom fields for better organization. Tasks can also be set as recurring if needed
One of ClickUp’s strengths is the variety of views, which allow users to visualize and manage tasks in ways best suited to their preferences and project methodologies. There are many views available, but we’ll focus on a few of the most popular ones for project management.
List, Board, and Calendar Views
The software offers a range of fundamental views that cater to different aspects of project management:
- List View: This is the most common way to manage and prioritize your tasks. It lets you group, sort, and filter tasks in any Space, Folder, or List
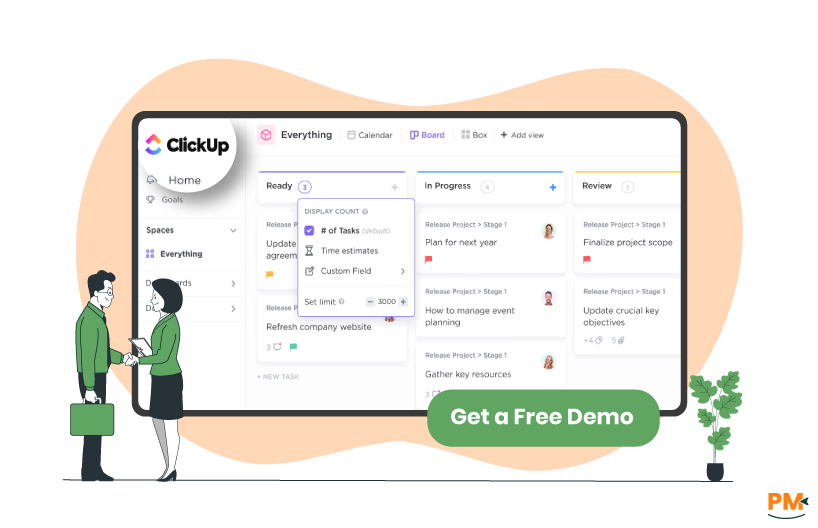
- Board View: That view is the go-to view for agile teams. It shows tasks by status and lets you drag and drop them through your workflow
- Calendar View: And this view helps with planning, scheduling, and resource management. Drag and drop tasks to adjust dates and visualize timelines
Gantt Charts And Timeline View
For comprehensive project planning and dependency management, ClickUp offers specialized views.
- Gantt View: It is used to plan projects, manage timelines, and set deadlines. You can track dependencies, milestones, and export your Gantt as a PDF
- Timeline view: This view is perfect for visualizing your schedule in a linear format. It’s great for roadmaps, planning, and managing resources over time
This project management ClickUp includes built-in collaboration features to ensure your team stays connected and information is shared efficiently. By keeping collaboration within the system, you can tie conversations directly to tasks or projects, making it easier to find later and ensuring everyone is on the same page.
Here are some key ways to collaborate with your team in the software:
Comments and Mentions
ClickUp’s Comments and Mentions keep team communication organized and task-focused. Comments allow users to discuss work, share updates, ask questions, or give feedback—directly within a task—so all related information stays in one place. To ensure the right people are notified, @mentions can be used to tag specific team members or entire teams, helping drive accountability and keeping everyone aligned on updates and decisions.
Sharing And Permissions
It offers robust sharing and permissions features for sharing projects, tasks, Dashboards, Docs, and Goals with team members or external guests. To share and manage permissions:
- Access Sharing Settings: Open ‘Sharing & Permissions’ from a Folder, List, or task. For Dashboards, find it in the upper-right corner
- Invite People: Enter email addresses to send invites
- Assign Permission Levels: Choose from Full Edit, Edit, Comment, or View Only
- Manage Guest Permissions: Guests can access specific items. Free Workspaces give them Full Edit by default. Paid plans allow setting view-only or controlled access
- Team Permissions: Permissions can be set for teams, with individual settings overriding team permissions
- Public Sharing: Items like tasks can be shared publicly via a URL, with options to control visibility and link expiration for Enterprise Workspaces
Project management involves many repetitive tasks – updating statuses, sending reminders, moving tasks when certain conditions are met, and so on. ClickUp’s automation features help take this repetitive busywork off your plate by automatically performing actions based on triggers you define.
Setting Up Automations
Its automation lets teams set rules that trigger actions based on specific events—saving time and ensuring consistent workflows.
To set up automations:
- Enable Automations ClickApp: Workspace owners or admins must first enable the Automations ClickApp from Workspace settings under ‘ClickApps’
- Open the Automation Setup: Go to the Space, Folder, or List where the automation is desired. In the upper-right corner, click the lightning bolt icon (Automate) and then ‘Create Automation’
- Understand Triggers and Actions: Every automation operates on a ‘When/Then’ formula. Here is how:
- Triggers (When this happens): Events like status changes, assignee updates, start/due date changes, task creation or movement, and custom field changes
- Actions (Then this will happen): Automatically apply templates, change assignees, update priorities or statuses, create tasks or subtasks, send messages, or track time
- Create Conditions (Optional): For Business Plan users and above, conditions can be added to make automations more selective, ensuring the action only occurs if specific criteria are met
- Set Up Reminders: Reminders can be created for oneself or delegated to others, serving as quick action items that don't necessarily require a full task. It can be set with specific dates and times, with customizable notification options
- Configure Notifications: Users can customize their notification preferences for email, browser, and mobile devices to filter out unnecessary alerts. These alerts can be set for task activities like status changes, assignments, mentions, and attachment changes
Integrating With Other Tools
ClickUp integrates with over 1,000 tools —including Slack, Jira, Zoom, and Microsoft Teams—for task updates, file sharing, meetings, and team collaboration, keeping everything connected. For apps without native integration, Zapier links ClickUp with thousands of platforms, helping automate workflows and reduce manual tasks.
Once your projects are underway in ClickUp, you’ll want to monitor progress and measure performance. ClickUp offers robust tracking and reporting tools to help your team stay on top of the work.
This section covers how to use ClickUp’s Dashboards and time tracking features to keep your projects on track:
Dashboards And Reporting
This system’s dashboards and reporting features provide a visual and analytical overview of work, enabling data-driven decision-making and proactive project adjustments.
Dashboards: These provide real-time insights and updates, serving as a visual representation of work for the entire team. They are built with customizable widgets showing tasks, goals, and targets—like pie charts for task status, sprint widgets, burndown reports, or revenue calculations—helping managers visualize data and make informed decisions.
To create a dashboard:
- From the Dashboards Hub in the Sidebar, click ‘New Dashboard’
- Alternatively, add a Dashboard view from the Views Bar or Quick Action menu
- Choose from available pre-made cards or create custom cards to add to the dashboard
- Customize card settings, including data source and time range
Reporting: This reporting feature helps track team progress and spot areas for improvement. Users can create custom reports or use pre-built ones to estimate project status—showing completed, overdue, or ahead-of-schedule tasks. Dashboards can be shared with the workspace, teams, or individuals via a link. Business Plan users can also export workspace data for stakeholder presentations.
Time Tracking
Its built-in time tracking features are essential for monitoring work hours, optimizing resource management, and gaining insights into project costs. Here’s how to leverage time tracking in ClickUp:
Enabling Time Tracking:
- A Workspace owner or admin must enable the Time Tracking ClickApp
- Go to Workspace settings by clicking the Workspace avatar (lower-left) and selecting ‘ClickApps’
- Search for ‘Time Tracking’ and enable it for all Spaces or selected ones
Logging Hours:
- Timer: Start tracking time by clicking ‘Start’ in the ‘Time Tracked’ field within tasks, List view, or Board view. The timer can be paused and resumed
- Manual Entry: Manually input total time spent, specifying duration and date
- Range Entry: Set a specific start and end time for a task. With Business Plan and above, users can add descriptions, labels, and mark entries as billable
Generating Reports:
Time tracking data can be viewed through Dashboards and reporting features.
- Time Tracking Cards: Create cards to filter and group time entries by task, List, Folder, or Space—show billable or non-billable time and toggle estimates
- Timesheet Cards: View tracked time by week, month, or custom range, grouped by day. Time tracking data appears in List, Table, Board, Calendar, and Gantt views by adding the ‘Time tracked’ column
Now that you’ve got the fundamentals down, let’s explore some advanced tips and best practices to truly maximize the effectiveness of ClickUp in your project management. These tips will help you save time, maintain consistency across projects, and tailor ClickUp to your team’s specific needs.
Utilizing Templates
The platform provides a wide range of templates to help you get started quickly with new projects or workflows. Templates can save you a ton of setup time and ensure consistency. Here’s how to make the most of templates:
- Accessing Templates: It offers a comprehensive Template Center, which serves as a library of ready-to-use templates for various items, including Spaces, Folders, Lists, tasks, Docs, views, and checklists. You can browse templates for different project types like work plans or budgets
- Applying Templates: When creating a new item, users can apply a template to pre-structure their work. This automatically populates the new item with predefined tasks, statuses, custom fields, and timelines
- Customizing Templates: After applying a template, it can be further customized to fit project needs. You can also create and save your own, complete with timelines, assignees, and details. Dates can be remapped to fit new project start dates
Implementing Custom Fields
Custom Fields are a fundamental feature that allows users to tailor ClickUp to their specific team processes and project requirements, going beyond generic task management.
Purpose of Custom Fields: Custom Fields enable the capture of unique types of information relevant to a specific workflow or industry that might not be covered by standard ClickUp fields.
Creating Custom Fields:
- From List or Table View: Open a Space, Folder, or List, click the plus icon (or ellipsis) above the task table, select a field type, name it, and click ‘Create.’ The field appears as a column and applies to all tasks in that location
- From Custom Field Manager: Access it from the sidebar, choose a location, click ‘Create new field,’ name, and customize it
- From a Task: Open a task, scroll to Custom Fields, click the plus icon, select ‘Create field,’ name, and customize it
Managing Custom Fields:
Once created, custom fields can be managed to ensure data consistency. You can set permissions (on Business Plus/Enterprise), make fields required, hide them from guests, or set default values. Custom fields can also be used to search, sort, and filter tasks for powerful analysis.
Is ClickUp suitable for Agile project management?
Yes, it supports Agile with Kanban boards, sprint management, customizable workflows, and collaborative tools like Docs and Whiteboards.
Can I track project budgets in ClickUp?
No. It doesn’t have built-in budget tracking, but you can monitor costs using time tracking, custom fields, budget templates, and dashboards.
Does ClickUp offer mobile access?
Yes, the software is available on iOS, Android, web browsers, and desktop apps—letting you manage work from anywhere.
How secure is my data in ClickUp?
The platform uses AWS hosting, follows GDPR, and offers security features like two-factor authentication and private links to protect your data.
Is there a learning curve for new users?
ClickUp is user-friendly for basic tasks but may take time to explore fully due to its wide range of features.